
Compiling Kernel for Radxa Rock Pro (+ rtl8187l support)
In the past few weeks I’ve been struggling to compile a kernel module for the Radxa Rock Pro, and ended up compiling the upstream kernel manually while configuring it to support my module.
Since it took much longer than I expected (mainly because of unexpected problems I wish I had known before I took this project), I decided to make a post describing my adventures with this wonderful device (and yes, I had to open a new blog to do that :)).
In this blog post I will try to describe the steps I had to make, including download links, of configuring, compiling and loading the upstream Linux kernel for the Radxa Rock Pro device.
When you’re done following this post, you should end up with a Rock Pro with the 3.18.11 Linux kernel, that loads it’s rootfs from the MicroSD card. Note that as far as I know, Rock Pro’s HDMI output is not supported on these new kernels (it didn’t work for me as well), so be sure you want don’t need your HDMI output before following this post.
Disclaimer: Most of the information in this post is taken from online posts, mainly from the Radxa wiki and CNX-Software blog. This post is just my attempt of simplifying all of the online information, and documenting / solving some issues I had when I tried to follow the online instructions.
ALFA AWUS036H
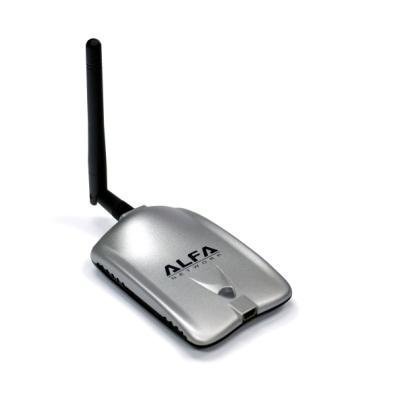 My target was to make the Radxa Rock Pro support ALFA AWUS036H’s monitor mode, and later on - airodump-ng and other similar tools. Sound simple!
Since I had never heard of this network device until I started this project, I looked it up online and saw it is based on the famous Realtek RTL8187L chipset. Searching online also brought up that I should make the rtl8187l driver run on my Rock Pro device, and I’ll be done with this project.
However, in order to compile a kernel module, I must have the running kernel + it’s configuration, and make sure it supports the Linux features required for the module to work (in this case - WIRELESS_EXT, MAC80211, …). After a few days of trying to compile the module with the pre-installed Radxa kernel from their site (3.0.36+ - https://github.com/radxa/linux-rockchip), I realised that I must use the upstream kernel, that already contains official rtl8187l module support, with my own configuration.
Pre-Requirements
- Radxa Rock Pro
- MicroSD Card (8GB+)
As the Radxa wiki says, you must own a Ubuntu 14.10 (or newer) Linux for the compilation process, along with GCC 4.9 or newer. When I tried to compile without these, I get an error from the precompiler stating that my compiler (GCC 4.8) has known issues when compiling the kernel, and that I should upgrade.
Of course, since we are compiling for the Radxa Rock Pro, you also need an environment including a cross compiler. You also need parted when creating the SD card image, and build-essential + libusb for rkflashtool. Run this installation line to install all dependencies before we start:
sudo apt-get install build-essential gcc-arm-linux-gnueabihf lzop libncurses5-dev libssl-dev bc parted build-essential libusb-1.0-0-de
Kernel Source
The Radxa wiki states you should clone the linux-next git repository and compile it for the Rock Pro. When I tried to do so and follow their steps - the compilation failed since the configuration was too old.
Therefore, I recommend using the Linux 3.18.11 kernel, it worked out-of-the-box and didn’t require any code changes. You can get it by running:
wget https://www.kernel.org/pub/linux/kernel/v3.x/linux-3.18.11.tar.xz
tar xf linux-3.18.11.tar.xz
cd linux-3.18.11
After extracting the kernel, you should download the default Rock Pro configuration along with the .dts file, that will be used when booting (again, taken from Wiki):
wget http://rockchip.fr/radxa/linux/rockchip_defconfig -O arch/arm/configs/rockchip_defconfig
wget http://rockchip.fr/radxa/linux/rk3188-radxarock.dts -O arch/arm/boot/dts/rk3188-radxarock.dts
Build Environment Configuration
Before we start to mess with kernel compilations, we should make sure to always use the cross-compiler environment suitable for our device.
Run the following in each terminal you use in the compilation process to set the build environment:
export ARCH=arm
export CROSS_COMPILE=arm-linux-gnueabihf-
Configuring Kernel
Copy the default Rock Pro configuration to the current configuration location:
cp arch/arm/configs/rockchip_defconfig .config
And configure the kernel as you’d like by running:
make menuconfig
(the menuconfig will use the .config we copied as the base for your changes). Since I’m describing my efforts to add support for the rtl8187l kernel module, the things I had to enable in the Kernel configuration are the following (the order is important!):
(You should navigate the menuconfig with the arrow keys and the space bar for selection. When selecting a feature, you can either mark it as built in <*>, kernel module <M> or unselected feature that will not be present in the kernel < >)
- Networking support -> Wireless -> Generic IEEE 802.11 Networking Stack (mac802111) (NEW) - set this to have <*> on the side (built-in kernel support)
- Device Drivers -> Network device support -> Wireless LAN -> Realtek 8187 and 8187B USB support - set this to have <M> on the side (kernel module)
Exit the menuconfig and choose < Yes > when asked whether to save the new configuration.
The message “configuration written to .config” should appear after saving. Now it’s time to compile our new configuration.
Compiling the Kernel + Modules
Run the following commands:
make prepare
make -j8 zImage dtbs
This will create 2 necessary files, zImage (the compressed kernel) and rk3188-radxarock.dtb (device tree blob, used at the Rock Pro boot).
Now let’s compile the modules for later use:
mkdir modules
export INSTALL_MOD_PATH=./modules
make modules
make modules_install
Now the “modules” directory is full with compiled kernel modules. We will use it later to build our SD card image.
Creating boot.img
Run the following commands to install Radxa mkbootimg:
git clone https://github.com/neo-technologies/rockchip-mkbootimg.git
cd rockchip-mkbootimg
make
sudo make install
cd ..
According to the wiki, we need to append the device tree blob to zImage (CONFIG_ARM_APPENDED_DTB option) until we can use U-Boot device tree support:
cat arch/arm/boot/zImage arch/arm/boot/dts/rk3188-radxarock.dtb > zImage-dtb
And after we have everything ready, make the boot.img out of the zImage-dtb:
mkbootimg --kernel zImage-dtb --ramdisk /dev/null -o boot.img
My working & ready boot.img is available for download here.
Preparing SD Card Image
When we’ll flash the kernel onto the Rock Pro, it will load and try to load the linux rootfs from the MicroSD card (you’ll see, when it’s part of the configuration that will be flashed in the next few steps).
Therefore we should make an SD card image ready with all of the compatible binaries and the modules we have compiled earlier, including the rtl8187l module.
To do that, we should start with an already ready SD card image, mount it’s ext4 partition locally on our Ubuntu and insert the kernel modules we built before.
I used this SD card image and did the following:
cd ..
wget http://dl.radxa.com/rock_pro/images/ubuntu/sd/radxa_rock_pro_ubuntu_14.04_server_k318rc5_141129_sdcard.zip
unzip radxa_rock_pro_ubuntu_14.04_server_k318rc5_141129_sdcard.zip
After having the SD Card .img file, we need to find out where it’s ext4 partition starts in order to load it to our Ubuntu. We will do it using “parted” we installed in the pre-requirements:
parted radxa_rock_pro_ubuntu_14.04_server_k318rc5_141129_sdcard.img
unit B
print
quit
You should see a table containing the start offset of the ext4 partition, which looks kind of like this:
Number Start End Size Type File system Flags
1 33554432B 1082130431B 1048576000B primary ext4
Use the start number we found before to mount the ext4 partition:
mkdir ubuntu_sdcard
sudo mount -o offset=33554432 radxa_rock_pro_ubuntu_14.04_server_k318rc5_141129_sdcard.img ubuntu_sdcard
If everything went well, ubuntu_sdcard now points to the ext4 partition in the SD card image file. We should now copy the modules and firmware into the ext4 partition:
sudo mkdir ./ubuntu_sdcard/lib/modules
sudo cp -r linux-3.18.11/modules/lib/modules/3.18.11/ ./ubuntu_sdcard/lib/modules
sudo mkdir ./ubuntu_sdcard/lib/firmware
sudo cp -r linux-3.18.11/firmware/* ./ubuntu_sdcard/lib/firmware/
Also, CNX-Software suggested (and I agree) to configure DHCP to the Ethernet port on boot:
sudo vi ./ubuntu_sdcard/etc/network/interfaces
And add the following 2 lines:
auto eth0 iface eth0 inet dhcp
Also, CNX-Software claims you need a script to detect rootfs at boot time. I used it, don’t know if it matters:
sudo vi ./ubuntu_sdcard/usr/local/bin/mtd-by-name.sh
And copy the following into the file:
#!/bin/sh -e
# mtd-by-name link the mtdblock to name
# radxa.com, thanks to naobsd
rm -rf /dev/block/mtd/by-name/
mkdir -p /dev/block/mtd/by-name
for i in `ls -d /sys/class/mtd/mtd*[0-9]`; do
    name=`cat $i/name`
    tmp="`echo $i | sed -e 's/mtd/mtdblock/g'`"
    dev="`echo $tmp |sed -e 's/\/sys\/class\/mtdblock/\/dev/g'`"
    ln -s $dev /dev/block/mtd/by-name/$name
done
Make sure the script is executable and edit the startup script:
sudo chmod +x ./ubuntu_sdcard/usr/local/bin/mtd-by-name.sh
sudo vi ./ubuntu_sdcard/etc/rc.local
And add the line below before exit 0:
/usr/local/bin/mtd-by-name.sh
That’s it. Let’s unmount the ext4 partition:
sudo umount ./ubuntu_sdcard/
And radxa_rock_pro_ubuntu_14.04_server_k318rc5_141129_sdcard.img should now contain your new files! You can download my compiled version here.
Flashing SD Card Image
To flash the newly created image, you should use Win32DiskImager if you’re on Windows (simply follow the GUI).
If you’re on Linux / OS X, you can use the dd command using this syntax (replace /dev/sdc with your SD card writer device):
sudo dd if=radxa_rock_pro_ubuntu_14.04_server_k318rc5_141129_sdcard.img of=/dev/sdc
Now take out your MicroSD card and put it in the Rock Pro. It will be necessary for boot after we flash the device.
Flashing the Kernel
Connect the device to your computer via USB, and follow these instructions to bring the Rock Pro to loader mode.
Get the parameter file describing kernel parameters by:
wget http://dl.radxa.com/rock/images/parameter/parameter_linux_sd
Install rkflashtool to flash the Rock Pro:
git clone https://github.com/linux-rockchip/rkflashtool
cd rkflashtool
make
sudo cp rkflashtool rkcrc rkunpack rkunsign /usr/local/bin
And use it to flash boot.img and restart the device:
rkflashtool P < parameter_linux_sd
rkflashtool w boot < boot.img rkflashtool b
Your device should now reboot into it’s new kernel, with rtl8187 support.
And that’s it! If you have any questions, fixes, etc, feel free to contact me / comment.